
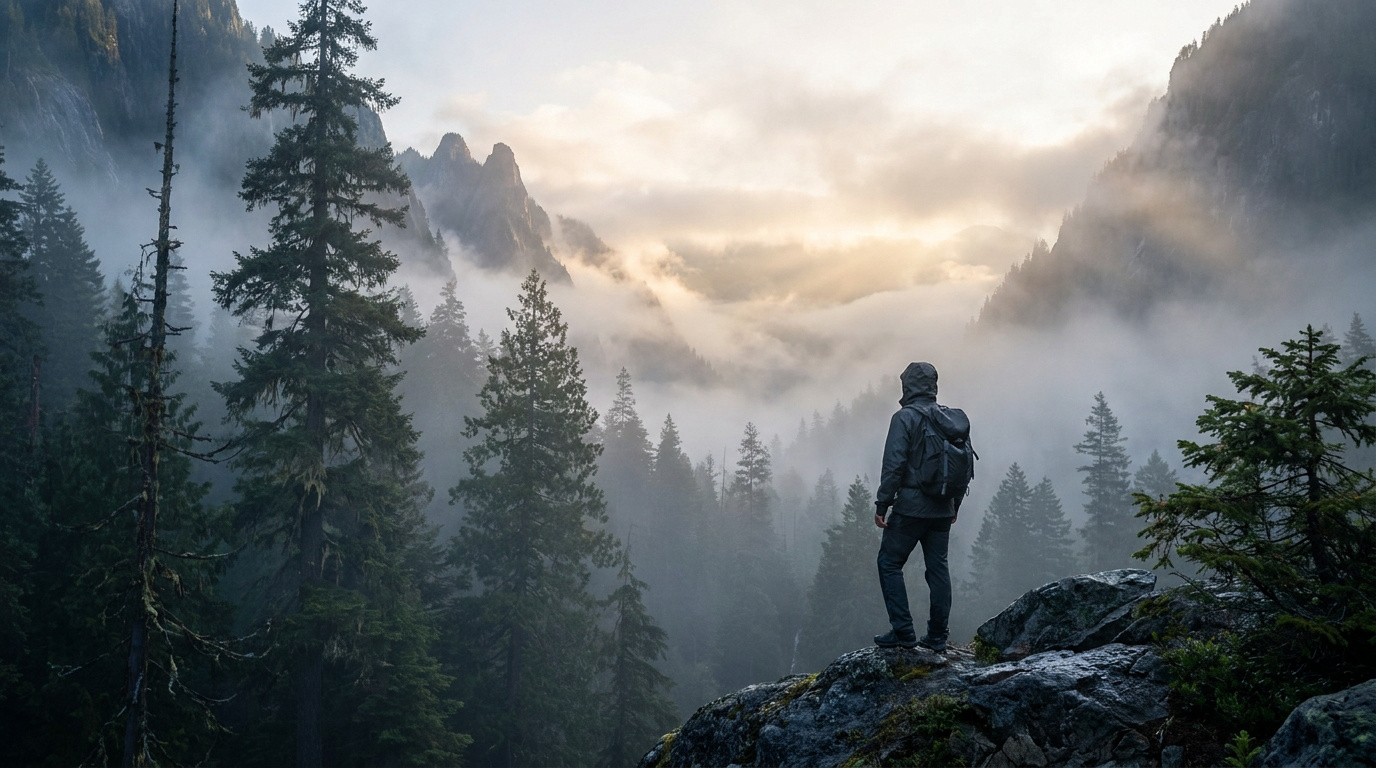
Key takeaway: Achieving professional results in fog requires manual focus and positive exposure compensation to prevent muddy, grey images. By anchoring compositions with dark foreground elements and using a tripod for slow shutter speeds, photographers can transform low-contrast environments into sharp, ethereal masterpieces. Remember that visibility under 1km defines true fog, necessitating constant lens cleaning to manage moisture.
Fog requires visibility to drop below 1 kilometer, creating a total environmental transformation that most cameras simply fail to interpret correctly. This atmospheric phenomenon turns familiar landscapes into mystical, low-contrast scenes that demand a specific technical approach to capture effectively.
Standard settings often result in muddy, underexposed frames that lose the ethereal magic of the moment. We will examine how to master manual focus, exposure compensation, and timing to ensure your misty shots retain their depth and professional clarity.
- Predicting and Identifying Fog Types for Better Shots
- 3 Technical Settings to Avoid Grey and Muddy Results
- How to Create Depth Using Light and Layers?
- Field Maintenance and Atmospheric Post-Processing
Predicting and Identifying Fog Types for Better Shots
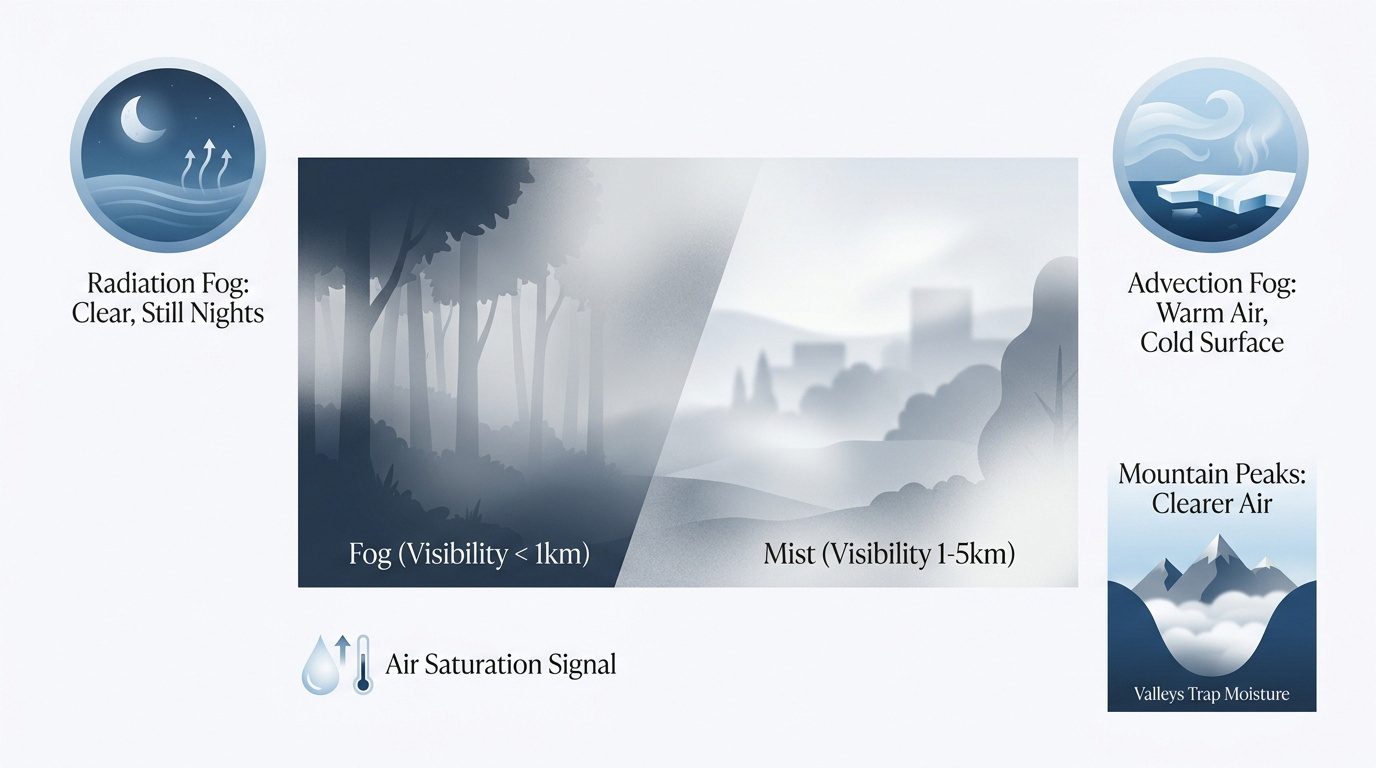
Fog requires visibility under 1 kilometer, while mist stays above this threshold. Radiation fog forms on clear, still nights, whereas advection fog rolls in via warm air over cold surfaces, demanding specific timing for landscape photographers to capture peak density.
The distinction between these two atmospheric states determines how light behaves in your frame, starting with the exact visibility limits that define the scene.
Understanding Fog Versus Mist Visibility Thresholds
Fog is strictly defined by visibility dropping below 1km. Mist remains between 1km and 5km. These technical thresholds dictate the visual mood. Fog grants total isolation, while mist merely softens background elements.
Water droplets scatter light constantly. Higher density leads to more scattering and plummeting contrast. This physical process effectively turns a forest into grey silhouettes rather than distinct, sharp trees.
Mountain peaks differ from woodland floors. Open spaces swallow mist quickly. Forests trap moisture, keeping the atmosphere thick for much longer periods.
Watch the dew point. It signals when the air will finally saturate completely.
Identifying Radiation and Advection Fog Patterns
Radiation fog demands clear skies and zero wind. The ground cools the air layer directly above. This creates that classic low-lying blanket seen in valleys or fields.
Advection fog is aggressive and mobile. It occurs when moist air moves over cold surfaces. Look for this near coastal cliffs or during warm fronts.
Use topographical maps to find basins. Cold air settles in low spots. These areas are prime targets for early morning shoots.
Check humidity levels above ninety percent. High humidity and falling temperatures guarantee thick morning cover. It never fails.
3 Technical Settings to Avoid Grey and Muddy Results
Predicting the weather is only half the battle; you need the right camera logic to keep the whites bright.
Mastering Exposure Compensation and Histogram Safety
Your camera meter wants to make everything middle grey. It sees a white wall of fog and underexposes it. You must intervene to keep the scene bright and airy.
Dial in positive exposure compensation immediately. Usually, plus one or two stops works best. This keeps the fog white instead of that depressing, muddy charcoal color we all hate.
Check your histogram constantly. Keep the data pushed to the right side. Just don’t let the highlights clip against the edge.
Overcoming Autofocus Hunting with Manual Precision
Autofocus systems require contrast to lock onto a subject. Fog removes contrast entirely. Your lens will just hunt back and forth without ever finding a sharp point to grab.
Switch to manual focus and use live view. Zoom in digitally on a dark tree trunk or rock. This ensures your focal point is actually sharp and not drifted.
Set your lens to the hyperfocal distance. This keeps everything from the mid-ground to infinity acceptably sharp. It saves time.
Shifting White Balance for Atmospheric Mood
Auto white balance often tries to neutralize the natural colors. It might make a cold morning look too warm. You want to control the temperature to match the actual feeling.
Try the “Tungsten” or “Fluorescent” settings for a blue tint. This enhances the eerie, cold vibe of a misty forest. It feels much more authentic to the viewer’s eye.
Always shoot in RAW format. This allows you to tweak the tint later without losing any image quality. It is vital.
How to Create Depth Using Light and Layers?
Beyond technical settings, visual storytelling in the mist relies on how you stack the elements in your frame.
Anchoring the Frame with Foreground Subjects
Fog flattens the world into a two-dimensional plane. You need a dark foreground object to act as an anchor. A weathered rock or a lone branch provides the necessary scale for the viewer to understand the distance.
Layers are your best friend here. The fog separates the dark foreground from the fading background. This creates a sense of three-dimensional space that would otherwise be totally lost.
Simplify the composition by hiding clutter. Fog acts as a natural eraser for messy backgrounds. Use it to isolate your main subject perfectly.
Chasing God Rays and Backlighting Glow
Shooting directly toward the sun creates magic in the mist. The light catches the water droplets and creates visible beams. We call these god rays, and they are stunning.
Position yourself so the sun is behind a tree. This helps define the light shafts. The backlighting will make the edges of the fog appear to glow intensely.
Watch out for lens flare. Use a lens hood or your hand to block direct rays. Keep the soft glow without the ugly spots.
Wait for the sun to rise slightly. The angle of light changes the beam intensity.
Field Maintenance and Atmospheric Post-Processing
Even the best composition fails if your lens is soaked or your editing destroys the very mood you captured.
Managing Moisture and Tripod Stability
Fog is just suspended water. It will condense on your front element within minutes. Keep a stack of microfiber cloths in your pocket to wipe the glass between every single shot.
Use a sturdy tripod for every frame. Low light levels in the fog require slow shutter speeds. You cannot hand-hold these shots and expect professional sharpness in the details.
Experiment with long exposures. This blurs the moving mist into a silky, dreamlike texture. It adds a surreal quality.
Cover your camera with a plastic sleeve. Internal moisture can ruin your electronics permanently.
Editing for Mood Rather Than Clarity
The biggest mistake is using the dehaze tool too aggressively. It removes the very thing that makes the photo special. Focus on gentle contrast adjustments instead. You want to preserve the soft, ethereal quality of the original scene.
Lift the black levels slightly. This prevents the shadows from looking too harsh against the soft white fog. It maintains that delicate balance of tones that defines atmospheric photography.
Try time-blending multiple frames. This helps if the mist was moving too fast during the shoot. You can layer the textures for a perfect result.
Mastering fog photography requires manual focus precision, positive exposure compensation to prevent muddy greys, and strong foreground anchors for depth. Grab your tripod and microfiber cloths now to capture these fleeting, ethereal scenes before the sun burns the mist away. Turn every atmospheric challenge into a hauntingly beautiful masterpiece.
FAQ
How can I accurately predict when fog will appear for a photo shoot?
Successful fog photography relies on high humidity levels, typically above ninety percent, paired with falling temperatures and very light winds. You should look for clear, still nights which often lead to radiation fog in valleys, or monitor warm fronts moving over cold surfaces for advection fog. Checking local weather forecasts for the dew point is essential, as it signals when the air will finally saturate and create that thick morning cover.
What are the best camera settings to use when shooting in misty conditions?
To avoid muddy, grey results, use manual mode and dial in positive exposure compensation, usually between plus one and two stops, to keep the fog white. Keep your ISO low, between 100 and 200, and choose an aperture between f/5.6 and f/11 for optimal sharpness. Depending on your goal, use a slow shutter speed (1/4 to 1/30 sec) for a silky texture or a faster speed (1/60 to 1/100 sec) for a more realistic rendering of the mist.
Why does my camera struggle to focus in the fog and how do I fix it?
Autofocus systems require contrast to lock onto a subject, and fog naturally removes almost all contrast, causing your lens to hunt back and forth. The best solution is to switch to manual focus and use your camera’s live view to zoom in on a dark, stable element like a tree trunk or rock. Alternatively, setting your lens to the hyperfocal distance ensures that everything from the mid-ground to infinity remains acceptably sharp.
How do I create a sense of depth when the mist makes everything look flat?
Fog acts as a natural eraser that simplifies the environment, so you must use visual layers to restore depth. Anchor your frame with a dark foreground subject, such as a weathered rock or a lone branch, to provide scale and a point of reference. This separation between the dark foreground and the fading, ghostly elements in the distance creates a three-dimensional space that guides the viewer’s eye through the atmosphere.
What is the best way to handle moisture and condensation on my gear?
Since fog is essentially suspended water, it will condense on your lens’s front element very quickly. Always carry a stack of microfiber cloths to wipe the glass between shots and consider using a plastic sleeve to protect your camera’s internal electronics. Additionally, using a sturdy tripod is vital because the low light levels in misty conditions require slower shutter speeds that cannot be stabilized by hand.
How should I approach post-processing for foggy landscape photos?
The key is to edit for mood rather than clarity; overusing the dehaze tool is a common mistake that destroys the ethereal quality of the scene. Instead, focus on gentle contrast adjustments and consider lifting the black levels slightly to keep shadows from looking too harsh against the soft white mist. Always shoot in RAW to ensure you have the flexibility to tweak the white balance and recover delicate textures during the editing process.