
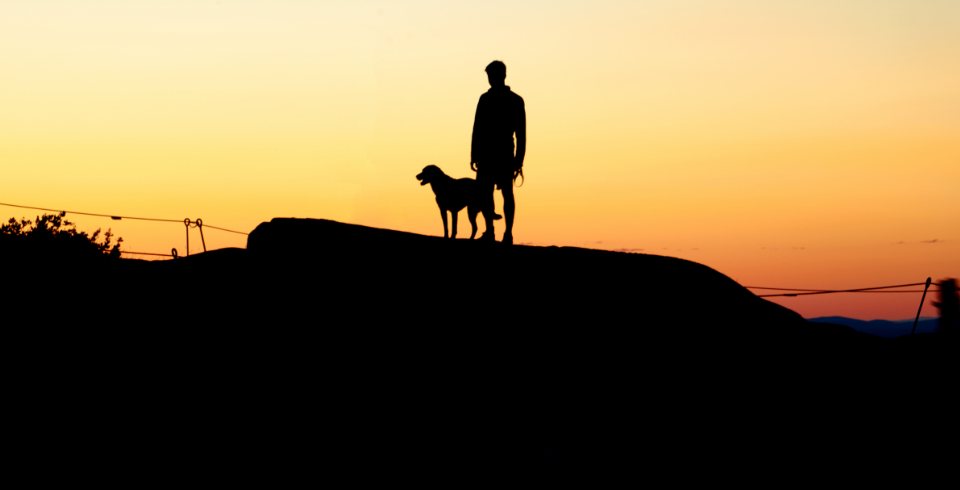
The oldest advice in photography is to keep the sun behind you. It is safe advice, and it produces safe pictures: evenly lit, easy to expose, and often lifeless. Somewhere along the way most of us turn around and start shooting toward the light instead, and the pictures immediately become harder and more interesting. Backlight makes edges glow, turns people into shapes, and fills the frame with an energy that front light cannot produce. It also blows highlights, fools meters, drains contrast and throws blobs of flare across the frame. This article is about getting the first set of effects while keeping the second under control.
What backlight does that nothing else can
When the light comes from behind the subject, it catches every edge that faces the camera at a glancing angle. Hair becomes a bright outline. The fuzz on a leaf, the steam from a cup, the spray from a wave, the fur on an animal: all of these light up against a darker background because the light is passing through or skimming across them. This rim light separates the subject from what is behind it more cleanly than any focus trick, and it is the reason backlit portraits look as if the subject has stepped forward out of the frame.
Backlight also makes translucent things glow. Leaves, petals, ice, thin fabric, a glass of something amber, the ears of a person or a dog. The light goes in one side and comes out the other carrying the object’s colour with it, far more intensely than reflected light would. Autumn woods shot into the sun are three times more colourful than the same woods shot with the sun behind you.
And it creates long shadows that come toward the camera, which act as leading lines and anchor the subject to the ground. A figure on a beach at sunset with its shadow stretching to the bottom of the frame has depth built in.
Exposing for the subject or for the light
The central decision in every backlit picture is which to keep: the detail in the subject or the drama of the light. A meter will average the bright background and the dark subject and give you a compromise that satisfies neither, so take the decision away from it.
To keep the subject, expose for the shaded side of the face or object. This means opening up, often by two stops or more compared to what the meter suggests. The background will go very bright, and parts of it may lose all detail. That is acceptable when the background is sky or a glowing field and the subject is what matters. The face will have a soft, even quality with a bright rim, and the picture will feel airy. This is the classic backlit portrait, and it depends on accepting blown highlights.
To keep the light, expose for the bright areas and let the subject go dark. Now the sky holds its colour and the subject becomes a shape. This is the road to silhouettes and to moody, high-contrast frames where the subject is defined by its outline rather than its surface. It costs you every detail in the subject, so the outline has to do all the work.
A middle path uses a reflector, a white wall or a pale floor to throw some light back onto the subject, narrowing the gap between the two exposures. Beaches, snow and pale pavements do this for free. A dark grassy field does not, which is why backlit portraits on grass are harder than on sand.
Silhouettes that read
A silhouette is a picture with almost no information in it, which is why it must be composed with care. The subject is reduced to an outline, so the outline has to be instantly recognisable and cleanly separated from everything else. A person seen from the side reads; a person seen from the front is a blob. Two people who overlap become one strange shape. Arms held away from the body, a hat, a bicycle, a dog on a lead: these give an outline its character.
The background must be bright and simple. Sky, water, a bright doorway, a lit wall. Anything with texture or mid-tones behind the subject will merge with it. Get low so the subject rises above the horizon into clear sky, or wait until the subject moves in front of the brightest area. Then expose for that background, usually a stop or two under the meter reading, and let the subject go completely black.
Partial silhouettes are often stronger than complete ones. A little rim light on the edge of a face or a trace of detail in clothing tells the viewer there is a real person in there. Full black is graphic; a hint of tone is human.
Flare: friend, enemy, and how to steer it
Flare is light bouncing around inside the lens. It appears as haze that lowers contrast across the frame, as coloured discs and streaks in a line from the sun, or as a starburst around the sun itself. Lens coatings reduce it but nothing eliminates it when the sun is in or near the frame.
Whether you want it depends on the picture. Haze can be lovely in a warm, dreamy portrait and disastrous in a landscape that needs clean colour. A starburst makes the sun a graphic element, and it appears when you stop down to a small aperture and the sun is a small point, often just peeking from behind a tree or a building edge. Coloured discs are the hardest to love; they tend to land on faces.
Control comes from a handful of moves.
- Shade the front of the lens with a hood or your hand, checking the corners of the frame for the hand’s shadow.
- Hide the sun partly behind something, which keeps the rim light and cuts the flare dramatically.
- Shift position slightly; a few centimetres changes where the flare falls, and often removes it.
- Take a second frame with your hand blocking the sun, and combine the two later if the flare cannot be avoided.
Clean the front element before shooting into the light. Dust and fingerprints that are invisible in front light become bright smears in backlight, and cannot be fixed afterwards.
Learning to face the light
The habit we recommend is to walk a circle around any subject before shooting it, and to spend at least a third of that circle with the light in front of you. Notice how the edges change, how the background brightens and darkens, how the mood shifts from documentary to dramatic as the sun swings toward the lens. Then choose. Front light describes. Side light sculpts. Backlight performs. All three are worth having, but the third is the one most people are afraid of, and that is exactly why the pictures made there stand out.